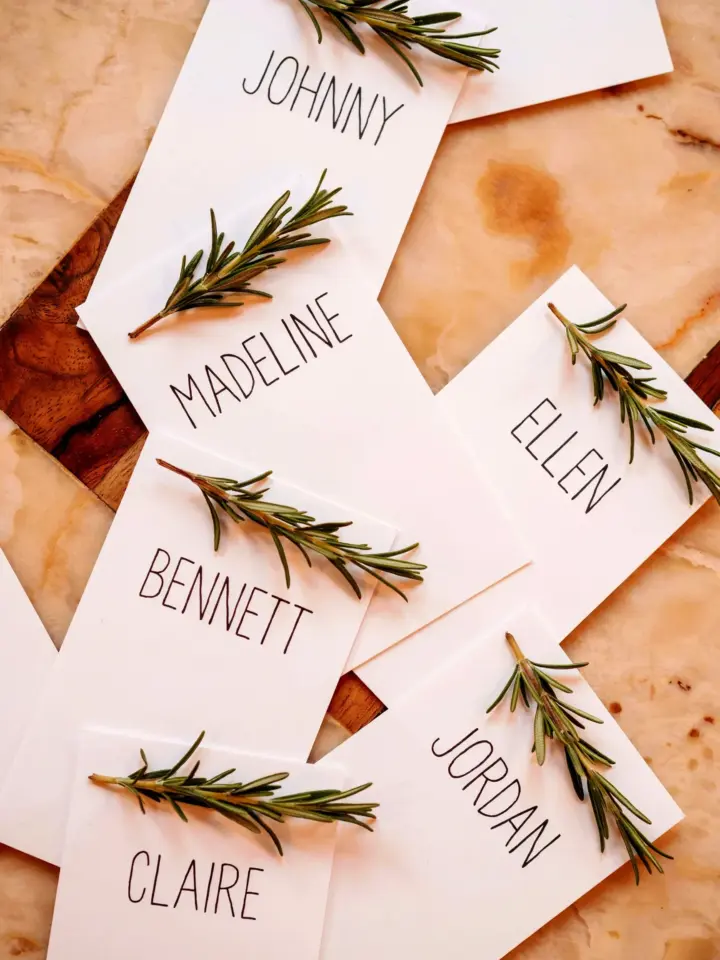
When I decided to make DIY place cards for my Thanksgiving table, I had no idea how much they would change the feel of the whole room. I took a quick photo of my bare table before I started. Just a plain wooden surface, some everyday dishes, and a simple centerpiece. It felt fine but not special. Then I spent maybe 20 minutes folding paper, cutting twine, and writing names. The after photo looked completely different. Warm, intentional, and ready for guests. That is what these simple place cards can do for your holiday hosting.
Why Simple Place Cards Make a Big Difference on Your Thanksgiving Table
A Thanksgiving table often has the same basic elements. Plates, silverware, glasses, and a centerpiece. Those are necessary, but they don’t create a personal touch. Place cards do something extra. They tell each guest that you thought of them before they even sat down. It adds a layer of thoughtfulness that costs almost nothing.
Plus, place cards solve the awkward question of where to sit. For large family gatherings, assigned seats can prevent confusion and help people mix. Even for a small group, naming a spot makes the table feel more curated. The best part? You don’t need fancy craft supplies. Just paper, twine, and a marker. The change from a plain table to a warm, inviting one is immediate.
What You Need for These DIY Place Cards (No Crafting Experience Required)
Gather these basic items. Most of them you probably already have at home. If not, they are cheap at any dollar store or craft aisle.
- Cardstock or thick paper (kraft paper, white, or any neutral color)
- A pair of scissors
- Twine, baker’s twine, or thin ribbon
- A fine-tip marker or pen (black, gold, or silver)
- Optional: a hole punch, small stamps, or dried herbs for decoration
That is the complete list. No glue, no hot glue gun, no fancy tools. I have made these with kids helping, and they work perfectly. The beauty of this project is that it leans into simplicity. You do not need to be crafty. You just need to fold and write.
Step by Step: How to Make Paper and Twine Place Cards
Start by cutting your cardstock into rectangles. I like to use pieces about 4 inches wide and 2.5 inches tall. That size is easy to fold in half lengthwise. If you want a tent shape, fold the rectangle in half so it stands up on its own. The folded edge becomes the bottom, and the open edges create a flap at the top.
Next, cut a piece of twine about 8 inches long. Wrap it around the folded card near the top edge. Tie a simple knot or a small bow on the front. Do not pull it too tight. You want the card to still open easily. Finally, write each guest’s name in the center of the front flap. Keep the writing simple. If your handwriting is messy, use block letters or a stamp. That is it. Your first place card is done.
Repeat for each guest. I typically make one extra just in case someone brings an unexpected plus one. The whole batch takes less time than you think. I made eight in under 15 minutes while watching a football game.
Creative Variations to Match Your Holiday Table Setting
Once you have the basic method down, you can tweak it to fit your personal style. The original version uses plain kraft paper and natural twine. That gives a rustic, farmhouse look. But you can also use white cardstock with gold ribbon for a more formal feel. For a modern touch, try black paper with a silver marker and thin silver cord.
Another variation is to add a small natural element. Tuck a dried bay leaf or a sprig of rosemary under the twine before tying the knot. It adds color and a faint scent. You can also punch a small hole in the top corner and thread the twine through it instead of wrapping around. That creates a hanging tag look. For a pop of color, use a bright marker like red or orange to match fall harvest tones.
If you are hosting a themed Thanksgiving, adapt the materials. A rustic table loves brown paper and jute. A minimalist table likes white and thin linen ribbon. The base idea stays the same. You are just choosing different textures and colors to match your existing decor.
Before and After: How These Place Cards Transform Your Table Decor
I want you to imagine your bare table. Now picture each setting with a small, folded name card standing upright next to the water glass. That is the after. The difference is not about grandeur. It is about intention. The place cards break up the empty space and give each seat a defined identity.
In my before photo, the table looked flat. The after photo shows depth and warmth. The twine adds a slight texture. The names draw the eye downward to each place setting. Suddenly the table feels complete. Guests notice immediately. I have had people say, “Oh, you made name tags. That’s so nice.” It costs nothing in materials but adds a lot in perceived effort.
If you want to enhance the transformation even more, pair the place cards with a simple napkin fold or a small sprig of greenery. But even alone, these place cards do the heavy lifting. They turn a generic surface into a gathered table.
Tips for Writing Names That Look Polished (Even with Bad Handwriting)
Handwriting can be a worry, but relax. You have options. First, practice writing a few names on scrap paper. Get a feel for the pen and the pressure. Use a fine tip marker so the line is clean. Write slowly. Capital letters are easier to read than cursive. If you prefer cursive, keep it big and loose.
Another trick is to use a pencil lightly first, then trace over it with marker. That helps get the spacing right. You can also print out names on your home printer onto cardstock, then cut and fold. That gives a perfectly uniform look. For a more handmade feel, use letter stamps with an ink pad. That is faster than writing and looks deliberate.
One practical tip: write the names the day before or the morning of the meal. Do not do it while you are juggling turkey timers and side dishes. A few minutes of prep makes the writing part feel calm and easy.
How to Prep These Easy Crafts in Under 30 Minutes
Time is tight on Thanksgiving day. That is why this project works so well. You can do all the cutting and folding the night before. Store the blank folded cards in a Ziploc bag. The next day, all you need to do is tie the twine and write the names. That takes about 10 minutes max.
If you want to go even faster, skip the twine and just fold the paper. A simple tent card with a name works just as well. The twine adds decoration but is not required. You can also use adhesive labels instead of writing directly on the paper. That is a lifesaver if your hands are shaky or you have a long guest list.
The whole process, from gathering supplies to finishing the last name, takes under half an hour. That includes cleanup. For a project that changes the entire feel of your table, it is one of the most efficient crafts I know. And when guests ask where you bought them, you get to say, “I made them myself.” That feels pretty good.
These place cards are a small touch with a big payoff. They turn a bare table into a warm, personal setting without stress or expense. Try them for your next holiday meal and see the difference for yourself. Save this idea so you can find it again when you need a quick way to make your table feel special.
#DIYPlaceCards #ThanksgivingTable #HolidayTableSetting #TableDecorIdeas #EasyCrafts
This post was researched and drafted with AI assistance, then personally reviewed and edited by Fern before publishing.
Leave a Comment